Since I started this blog, I have been getting more and more reluctant to get rid of anything that has a potential use. This has lead to the accumulation of a lot of worn out clothing and fabric scraps. For this project I made four selections from my scrap pile:
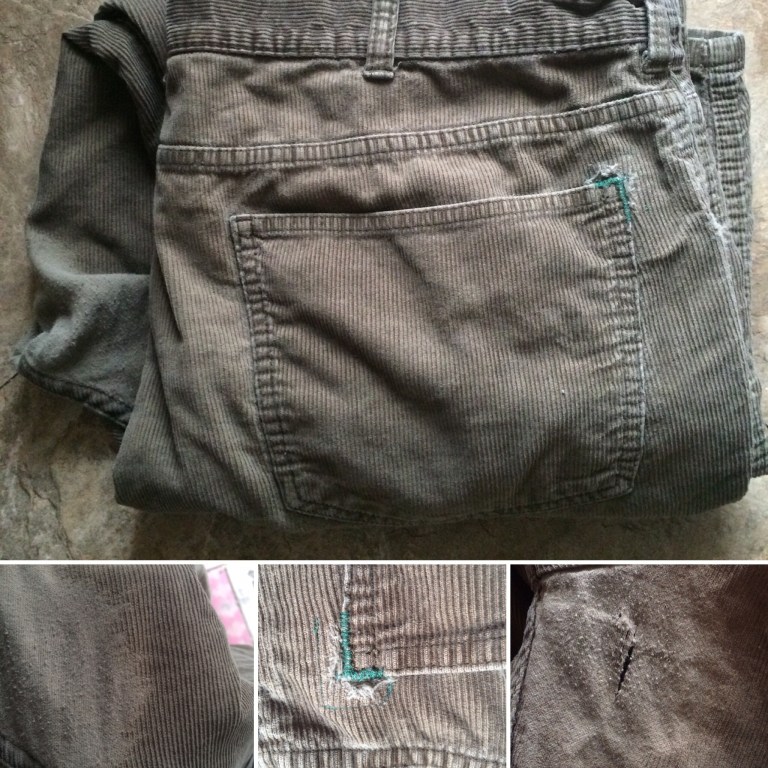
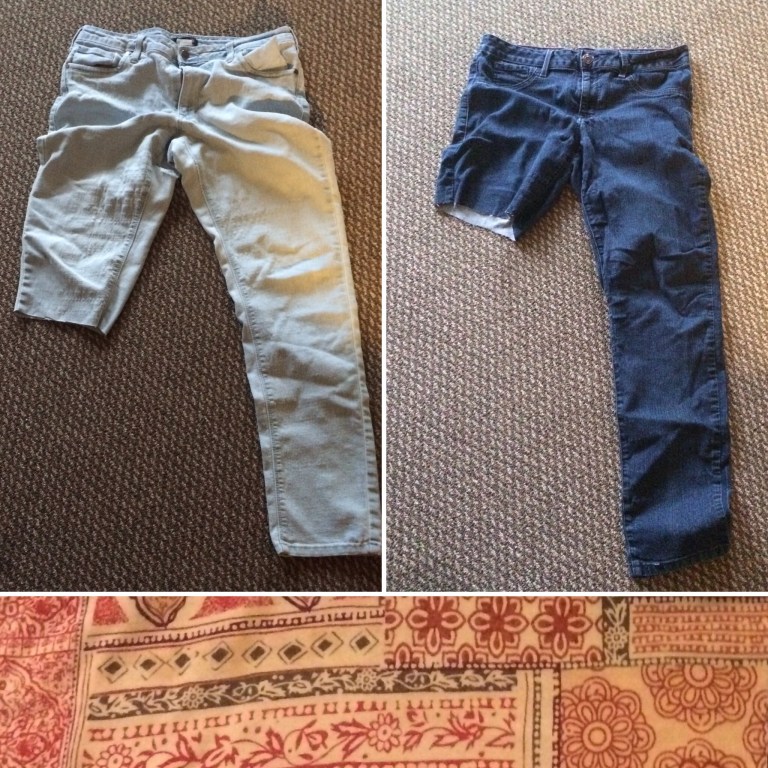
Item #1: An old pair of corduroy pants that Doug has worn out, ripped, patched and ripped again. They needed to go.Items #2, 3 and 4: Two pairs of cut up jeans leftover from the whale project, and some scraps of fabric from a skirt I cut up a while ago.
I decided on making a tote bag because they are fairly quick and easy to sew. I used this bag as a reference for size and style:
This bag is starting to get pretty worn out. I made it almost 10 years ago, from a $1 thrift store skirt. I wish I had a photo of the original skirt, because it was long and hideous, with really bizarre slits cut along the sides. But the fabric was durable, fun to work with, and had neat stripes of different materials woven through it.
One note I would like to make before I take you through the steps I followed to create this bag: I am terrible at planning ahead. I mainly just wing it as I go along. I could have easily looked up a pattern to make a good bag, but I wanted to experiment and figure it out myself. This method doesn’t always lead to the best product, but I always learn something new in the process, and I can take those lessons with me to my next project. The best way to learn something well is to fail at it a bunch of times!
I will also admit this is not my best photo-documentation, but here we go:
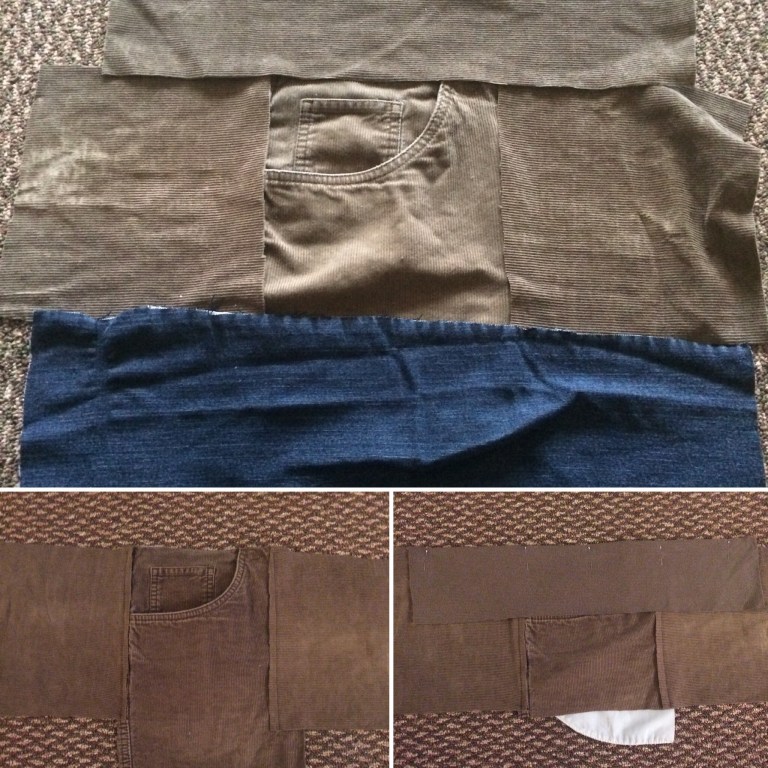
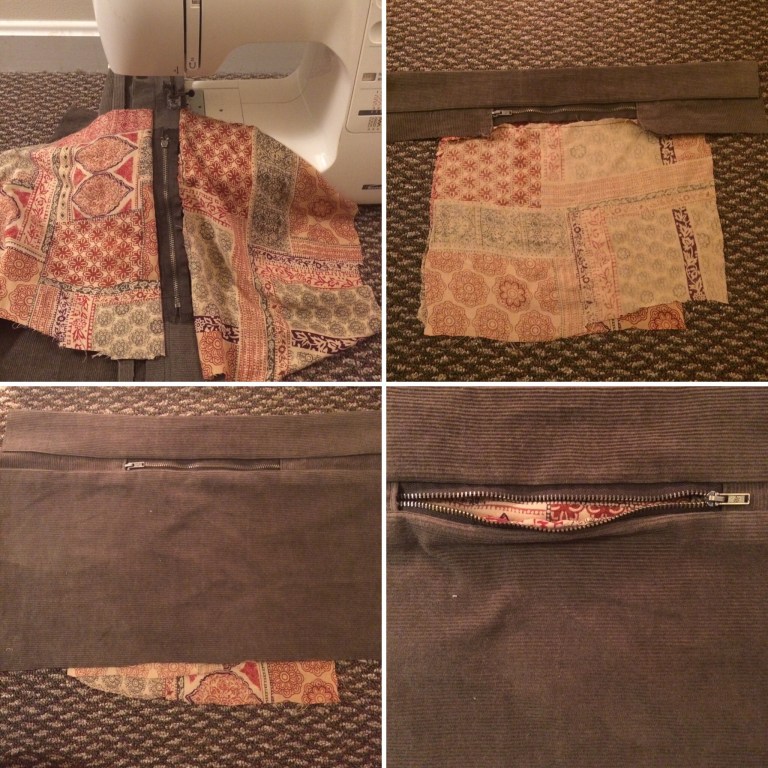
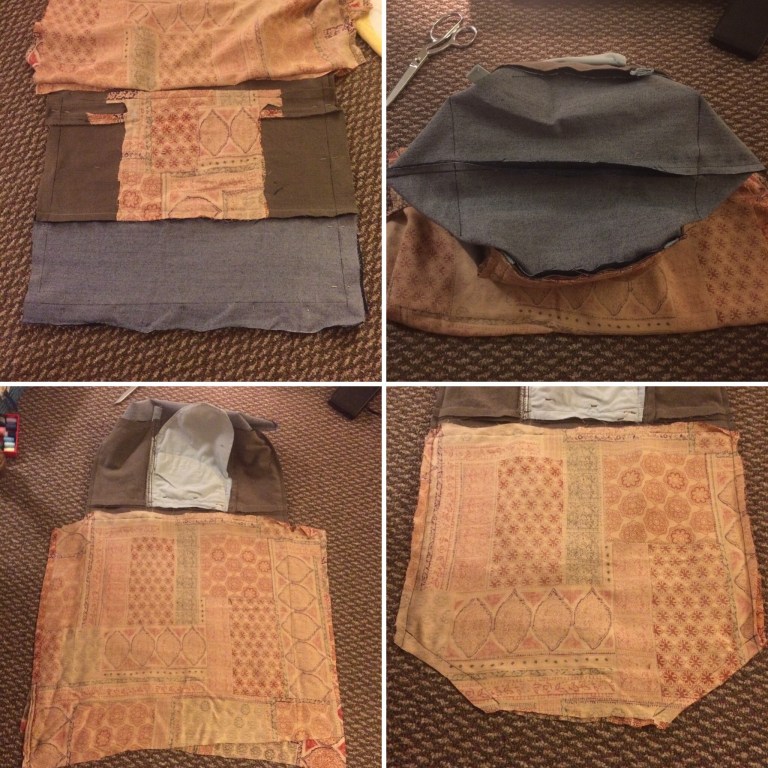
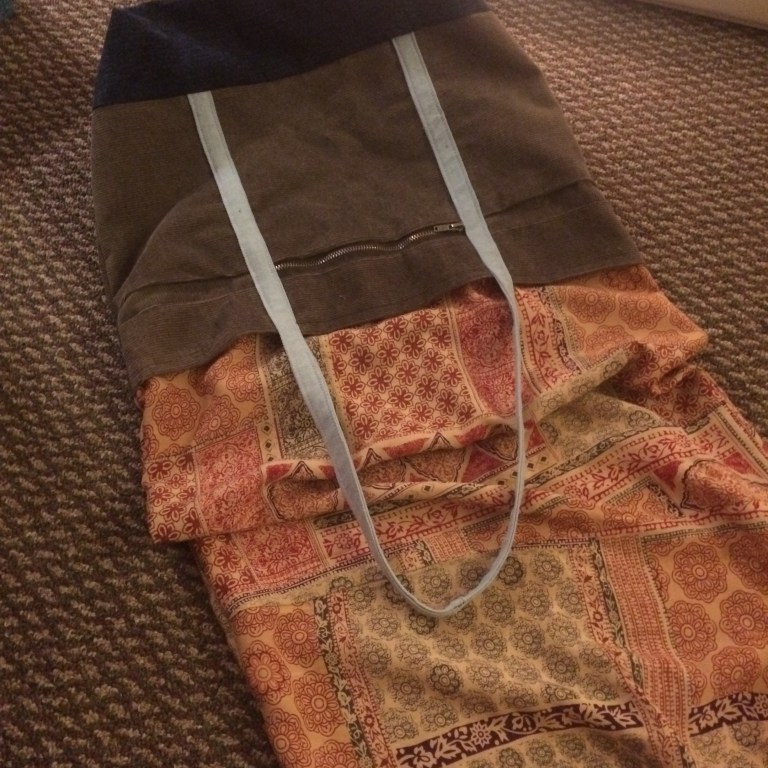
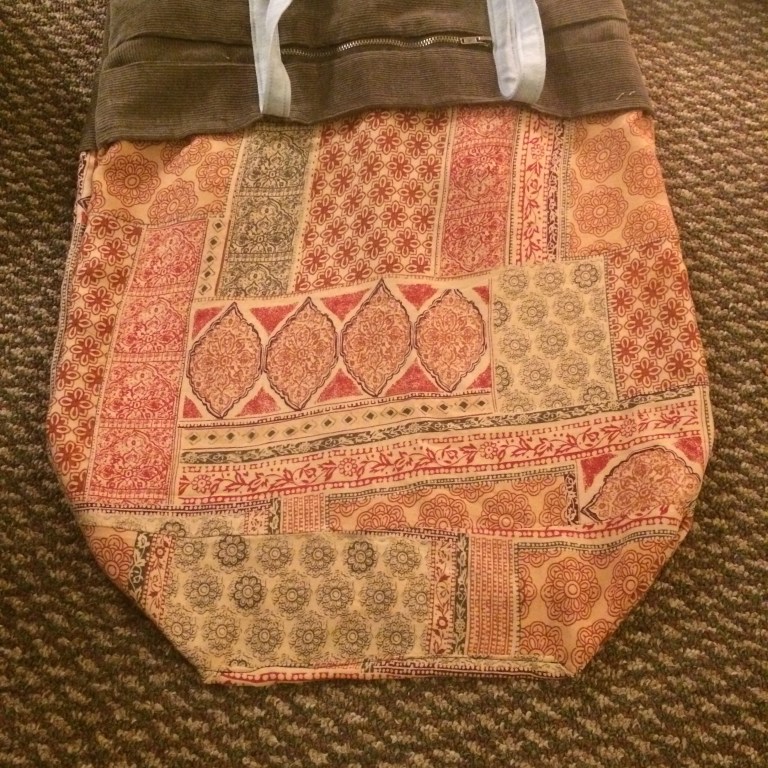
First, I laid out the pieces I wanted for the front of the bag and cut them out approximately to size. I thought the pocket would make a cool feature, and I framed it with three other pieces of the corduroy fabric.Next step was to create the back of the bag. I harvested the zipper from the fly of the pants so I could put a zipper pocket in my bag. I attached two smaller pieces of the corduroy to the sides of the zipper and then a third piece across the top. To make the lining of the zipper pocket I used the skirt fabric and attached one piece of it to the top of the zipper.To complete the back of the bag, I sewed another piece of the skirt fabric lining to the other side of the zipper. I covered up the mess with a final large piece of corduroy. As you can see in the bottom right picture here, when you open the zipper, you have a nice lined pocket.Next was time to make the handles of the bag. I cut out long strips of the light colored denim, folded them in half and sewed up the edges. Then they needed to be turned right side out and pressed with an iron to keep them nice and flat while I attached them to the front and back pieces of the bag.I pinned the handles in place on the front and back pieces, making sure they were the same length on each piece. I sewed them into place and then added a piece of the dark denim material to the bottom of each piece.The last few steps are a bit confusing from my photos. I sewed a liner piece to the top of the front of my bag and another to the top of the back of the bag. Next, I laid both pieces right sides together, lining up the handles. When it was all laid out and pinned, I was able to sew up the edges of both the bag and the lining. I left an opening in the bottom of the lining so that the entire piece could be turned right side out. I also sewed the corners of the dark denim bottom so the bag would have a little more shape and structure to it.Finally it was time to turn the whole thing right side out!The last step was to stitch closed the hole in the lining, and stuff the lining into the bag.
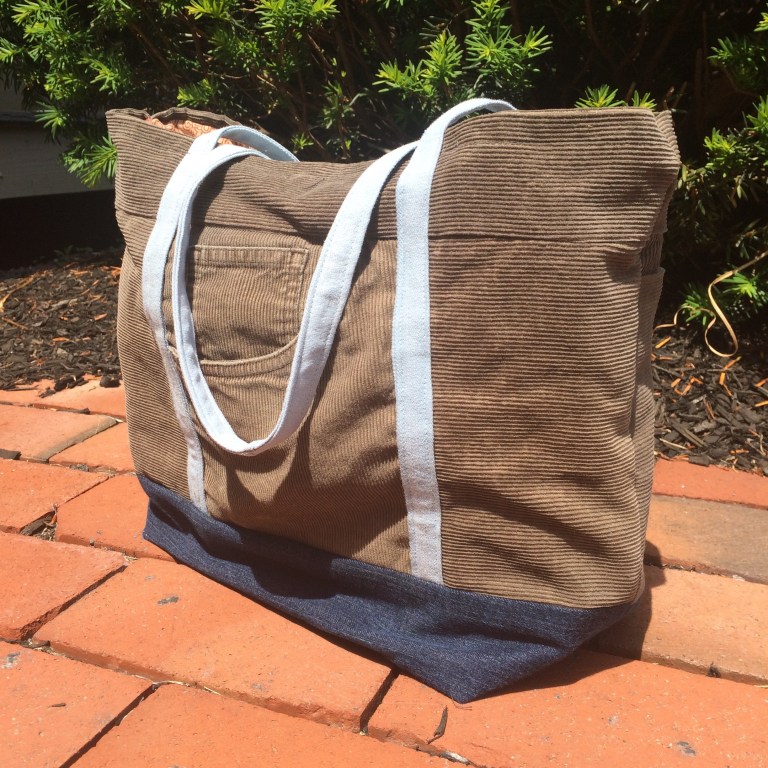
The final product:
Like I said before, this whole process was more about experimenting and tinkering with different ideas than creating a polished product. A couple key takeaways from this project for me were:
The denim and corduroy I used are pretty thin and weren’t really strong enough to provide this bag with as much rigid structure as a canvas tote bag. In other words, the bag is pretty floppy. Next time I would use a stiffer material.
Next time I want to try something different with the lining, because it just sort of floats inside the bag and isn’t really anchored to anything. I also want to get fancy and make more interior pockets in the lining.
I think I am partially colorblind. Throughout this whole process I was convinced the corduroy material was green. Now that I see it in all the photos on my computer, I think it is brown?


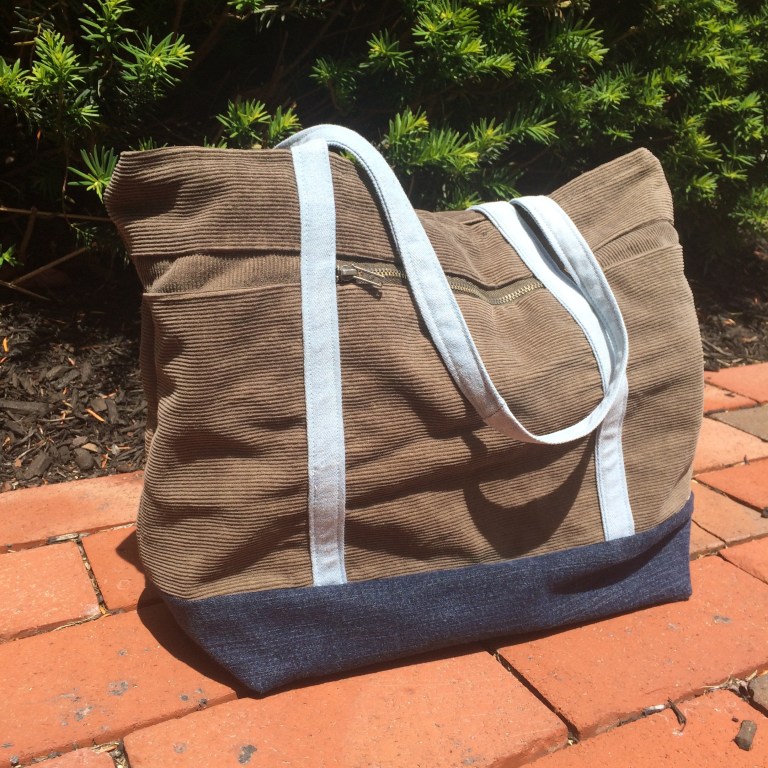

Oh my word, I LOVE it!! Beautiful! And haha, it’s totally brown corduroy. 😉
LikeLike